


AI Lifestyle Product Photos & Jewelry Photography With AI: The Complete 2026 Playbook
August 8, 2026
What Is a Clipping Path? Complete 2026 Guide with 20 Real-World Use Cases
August 13, 2026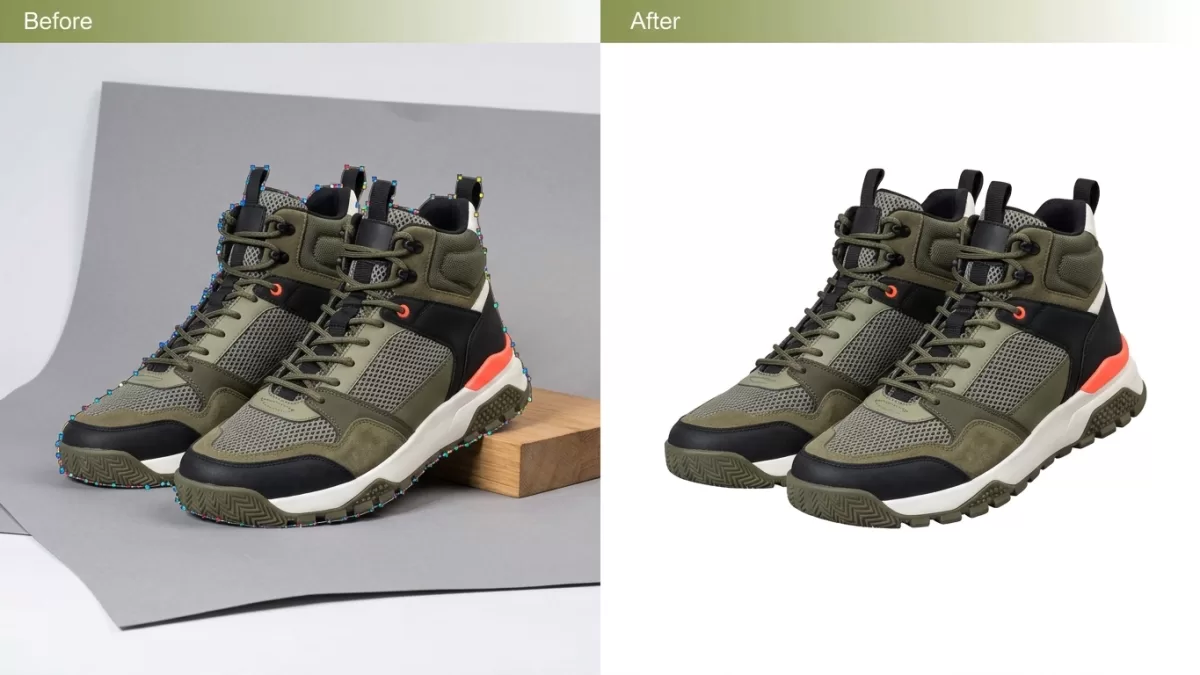
TL;DR — What You Actually Need to Know
- E-commerce product photo editing is the post-production process that turns raw studio shots into marketplace-ready visuals through ten core steps: background removal, clipping path, image masking, color correction, shadow creation, ghost mannequin, retouching, multi-clipping, sharpening, and file export.
- Amazon requires the main image on a pure white background (RGB 255,255,255) with the product filling at least 85% of the frame and dimensions above 1,000 pixels on the longest side for zoom to activate.
- Baymard Institute research shows 25% of e-commerce sites still fail on image resolution or zoom — a fixable gap that separates premium stores from average ones.
- Akeneo’s 2025 Consumer Returns Report found 34% of shoppers returned products because photos were misleading — proof that accurate editing directly protects revenue.
- Outsourced manual editing ranges from $0.25 to $6.99 per image in 2026, with volume discounts starting at 10% for 50+ images and reaching 40% at 1,000+.
- Who This Guide Is For
- What Is E-Commerce Product Photo Editing?
- Why Product Photo Editing Drives Conversions and Reduces Returns
- The 10 Core Techniques of E-Commerce Product Photo Editing
- The 11-Step Professional Editing Workflow
- Color Profiles: sRGB, Adobe RGB, or CMYK?
- How to Batch Process Product Photos at Scale
- In-House Editing vs Outsourced Editing — The Real Math
- How to Brief an Outsourced Photo Editor
- Marketplace Image Rules at a Glance (2026)
- Manual vs AI Editing: Honest 2026 Comparison
- Common Product Photo Editing Mistakes to Avoid
- Real Example: Editing a Jewelry Product Shot
- 2026 Trends Shaping Product Photo Editing
- Alternatives to Full Manual Editing
- FAQ — People Also Ask
- Final Thoughts
Who This Guide Is For
If you sell physical products online and your images decide whether shoppers stay or bounce, this guide gives you the full editing playbook without fluff. It serves:
- Amazon, Shopify, Etsy, Walmart, and TikTok Shop sellers who want listings that convert.
- DTC brands and catalog studios managing thousands of SKUs each season.
- Product photographers and creative agencies looking to sharpen their post-production workflow.
- In-house marketing teams deciding whether to hire, insource, or outsource editing.
By the end, you will know exactly which techniques matter, in what order, at what cost, and how to ship images that pass every marketplace rule.
What Is E-Commerce Product Photo Editing?
E-commerce product photo editing is the post-production process of refining raw product photographs so they display cleanly on white or lifestyle backgrounds, communicate the product honestly, and comply with each marketplace’s image rules. Editors remove clutter, isolate subjects, correct color, add realistic shadows, and export files sized for both fast loading and full-resolution zoom.
The output is not “prettier photos.” The output is higher conversion, lower returns, and no listing rejections. That is the entire business case in one line.
Every modern workflow blends manual Photoshop craftsmanship with AI-assisted tools. AI handles bulk background masking in seconds. Human editors clean up hair edges, reflective metal, glass, and complex composites that automation still misjudges. The winning studios in 2026 use both.
Why Product Photo Editing Drives Conversions and Reduces Returns
Product photos do more work than any other element on a listing. Shoppers cannot touch what they see, so the image becomes the product until it arrives on the doorstep.
Three verified data points prove the stakes:
- 25% of e-commerce sites fail to provide sufficient image resolution or zoom levels, per active Baymard Institute research — meaning better editing is a genuine competitive edge you can seize without shooting a single new frame.
- 34% of consumers returned products in the past year because pre-purchase photos were misleading, according to the Akeneo 2025 Consumer Returns Report.
- Industry analyses consistently report that professionally edited product images lift conversion rates by 30% to nearly double compared with unedited photos, depending on category and price point.
Beyond conversions, clean editing keeps listings compliant. Amazon suppresses images that fail its main-image rules, and a suppressed listing produces zero sales no matter how good the product is.
The 10 Core Techniques of E-Commerce Product Photo Editing
Every professional workflow rests on these ten techniques. Master them in this order and your catalog stays consistent across thousands of SKUs.
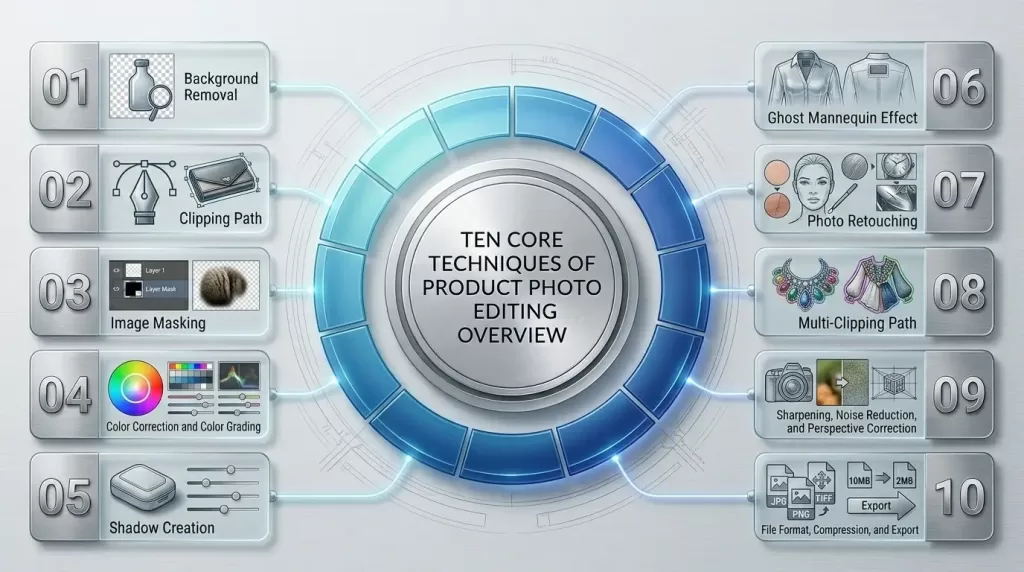
1. Background Removal — The Foundation Step
Background removal isolates the product from its original setting. Clean backdrops match marketplace rules, cut visual noise, and let the same product photograph appear on white, lifestyle, or gradient scenes on demand.
Two techniques dominate:
- AI-powered removal — one-click, ideal for hard-edged geometric products like boxes, phones, and bottles.
- Manual clipping or masking — hand-drawn in Photoshop, essential for hair, fur, glass, jewelry chains, and reflective metals.
Our internal background removal breakdown compares both approaches with real examples across product categories.
Want to replace messy backgrounds with pure white or custom colors?
Our expert Background Removal Service makes it quick and effortless.
2. Clipping Path — Precision With the Pen Tool
A clipping path is a hand-drawn vector outline created using the Photoshop Pen Tool (P). Because it is vector, the outline scales infinitely without pixelation — the same path works for a thumbnail or a billboard.
Manual paths outperform automated selections on:
- Complex silhouettes with negative space (bicycles, wire baskets, jewelry chains).
- Reflective and metallic surfaces where AI reads highlights as background.
- Large catalogs that must show identical edge quality across every SKU.
Skilled editors work at 300–400% zoom, placing anchor points every 8–12 pixels and using curved handles rather than dense straight segments. The result is a mathematically precise cutout that survives any zoom test Amazon or Shopify performs.
3. Image Masking — For Hair, Fur, Glass, and Transparency
When products carry soft, wispy, or semi-transparent edges — model hair, fur-lined jackets, wedding veils, perfume bottles, tinted glass — a clipping path alone is not enough. Image masking uses alpha channels, layer masks, refine-edge, and channel masking to preserve every strand while cleanly separating the subject.
Four masking techniques cover almost every scenario:
- Alpha channel masking — best for glass, smoke, and translucent liquids.
- Layer masking — non-destructive editing for composites.
- Refine edge masking — fastest route for hair and fur against contrasting backgrounds.
- Channel masking — extracts subjects from complex or similar-colored backgrounds.
Skilled editors finish with color decontamination — a subtle step that removes fringe pixels tinted by the old background. Without it, cutouts on white keep a faint halo of the original scene, and shoppers feel something is off even if they cannot name what.
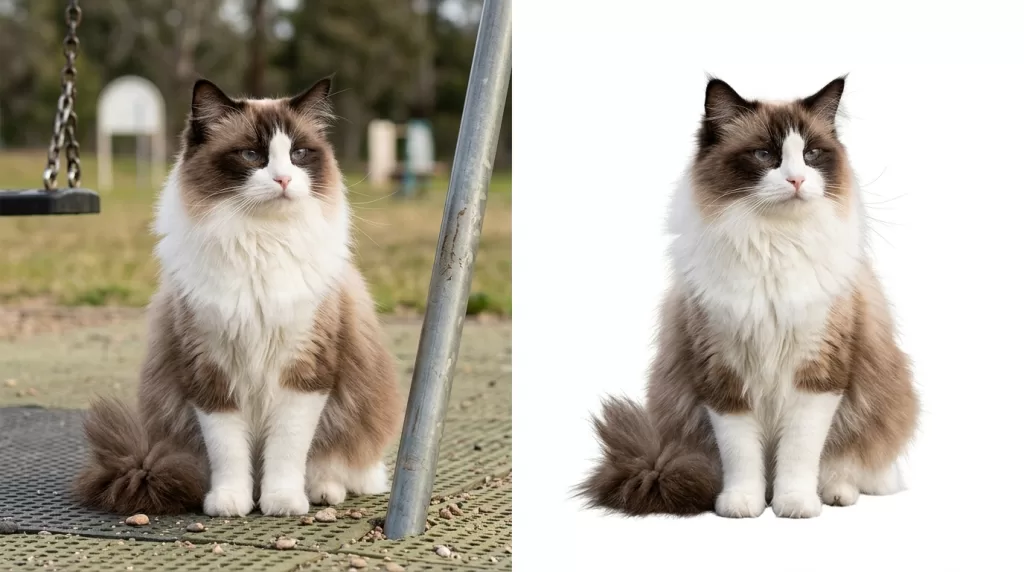
Struggling with complex hair or fur edges?
Let our experts deliver flawless, natural cutouts with our advanced Image Masking Service
4. Color Correction and Color Grading
Cameras rarely capture color the way the human eye perceives it. Studio lights add warm or cool casts, sensors clip highlights, and every monitor renders the same file differently. Color correction fixes what the camera got wrong; color grading adds intentional mood and brand consistency on top.
The professional order of operations:
- Set white balance using a grey card or a true-white reference point (Ctrl/Cmd + click on a known-white pixel in Camera Raw).
- Balance exposure using histogram checks — avoid clipped blacks or blown whites.
- Tune highlights, shadows, and midtones with Curves rather than the Brightness slider.
- Adjust Vibrance before Saturation for a more natural pop.
- Apply the same preset across every SKU in a shoot for catalog consistency.
Our internal color grading primer walks through the full workflow. Getting color right is not cosmetic — the Akeneo data above shows misleading color drives real returns.
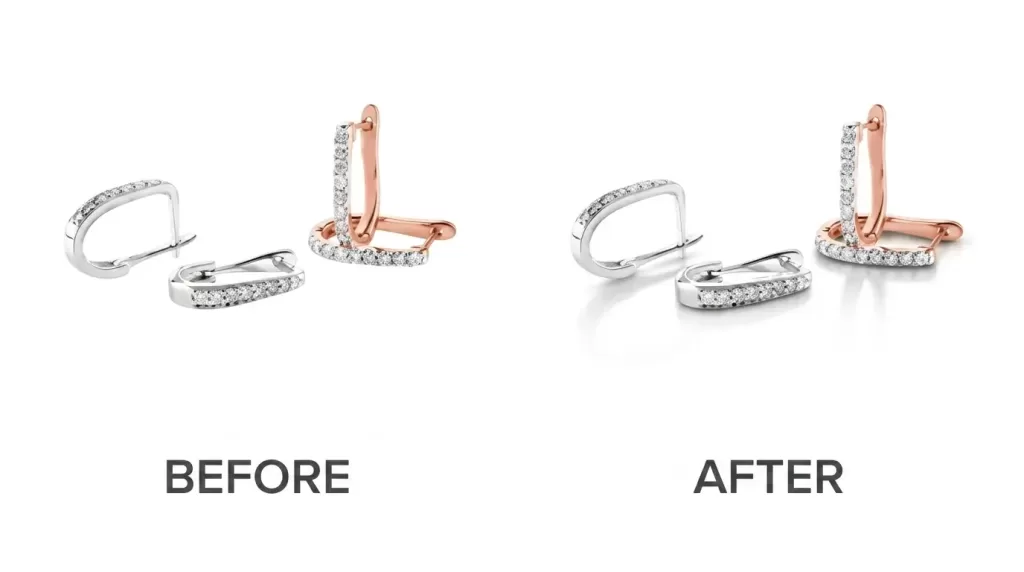
5. Shadow Creation — Adding Realism and Depth
Cutouts on pure white without shadows look sterile — the product appears to float in space rather than sit on a surface. A convincing shadow grounds the item and lifts perceived value instantly.
Nine shadow variations cover almost every scenario:
- Drop shadow — soft, generic backdrop shadow.
- Natural shadow — recreated from the original ambient light direction.
- Reflection shadow — mirrored beneath glossy, premium products.
- Floating shadow — for products photographed mid-air.
- Cast shadow — angled projection across the floor plane.
Amazon’s white-background rule does not forbid subtle shadows, and adding them measurably lifts perceived quality on the same product photograph. Our full shadow creation breakdown walks through each variation with samples.
6. Ghost Mannequin Effect — The Invisible 3D Apparel Look
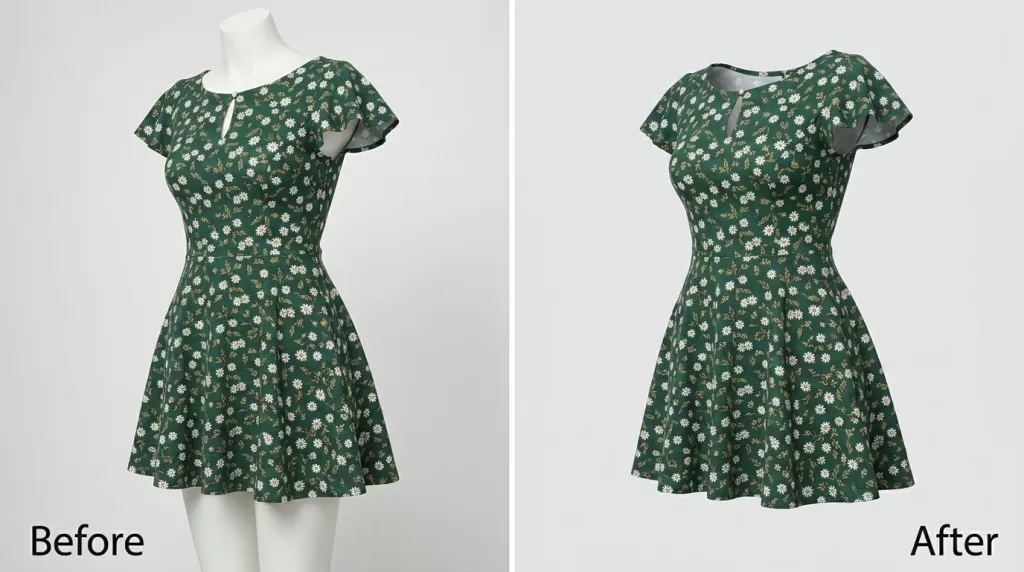
The ghost mannequin effect (also called invisible mannequin or 3D hollow-man) removes the mannequin from apparel shots while preserving inner details — collar linings, cuff seams, hems, and brand labels. Buyers see the garment as if worn by an invisible figure, which shows shape and drape without the cost of a live model shoot.
Three joint variations handle most garments:
- Neck joint — tees, shirts, sweaters, hoodies.
- Sleeve joint — jackets, blazers, cardigans, coats.
- Bottom joint — open-hem dresses, tunics, drop-hem garments.
Editors composite two shots — one on the mannequin, one showing the interior — then align the shapes and rebuild the inside seams pixel by pixel. Done well, buyers cannot tell the mannequin was ever there.
7. Photo Retouching — The Invisible Polish
Retouching is the fine-cleanup pass — dust removal, blemish fixing, fabric wrinkle reduction, symmetry corrections, and stray-thread cleanup. On human skin, retouching relies on frequency separation and dodge-and-burn to smooth complexion while keeping natural texture and pores intact.
The rule: great retouching is invisible. Shoppers should think “nice photo,” never “wow, that’s heavily edited.” Over-processed images read as plastic and destroy trust.
Common product-retouching fixes:
- Dust and micro-scratches on the product surface at 400% zoom.
- Fabric wrinkles on apparel using frequency-separation techniques that straighten creases without altering the weave pattern.
- Stray hairs, threads, lint, and packaging imprints.
- Symmetry corrections on jewelry, cosmetics bottles, and packaging.
- Reflection cleanup on glossy or metallic surfaces.
Want your images to look professionally edited, not over-processed?
Achieve natural, high-end perfection with our skilled Photo Retouching Service
8. Multi-Clipping Path — Layer-by-Layer SKU Multiplication
A single clipping path isolates one subject. A multi-clipping path draws several separate vector paths inside the same image, so each product component becomes independently editable. Fashion brands use this to generate every shirt colorway from one master shoot. Watchmakers use it to swap dial, bezel, and strap independently.
The ROI is immediate. A single high-quality shoot processed through multi-clipping paths can generate dozens of SKU variants that share identical lighting, pose, and composition — with no reshoot cost. The technique also underpins any serious color-change or SKU-variation service.
9. Sharpening, Noise Reduction, and Perspective Correction
Even well-shot images benefit from a final technical pass:
- Sharpening — brings out product texture and detail. Use High Pass sharpening masked to edges for cleaner results than Unsharp Mask on the whole layer.
- Noise reduction — cleans grainy shadows, especially on low-light shots. Our post on noise reduction walks through the safe order of operations.
- Lens and perspective correction — fixes wide-angle distortion, converging verticals on furniture shots, and chromatic aberration around high-contrast edges.
- Cropping and alignment — every image in the catalog framed to the same rules.
These edits look subtle individually. Compounded across 10,000 SKUs, they turn an average catalog into a visibly premium one.
10. File Format, Compression, and Export
The final step exports each image in the format each channel demands. Get this wrong and every earlier step is wasted:
| Platform | Recommended Size | Format | Notes |
|---|---|---|---|
| Amazon (main) | ≥ 1,600 px longest side | JPEG (sRGB) | Pure white RGB 255,255,255; product fills ≥85% of frame |
| Shopify | 2,048 × 2,048 px | JPEG or WebP | ≤ 20 MB max; aim for < 300 KB per file |
| Etsy | ≥ 2,000 px on shortest side | JPG / PNG / GIF / HEIC | 10 photos + 1 video per listing |
| Google Merchant Center | ≥ 800 × 800 px | JPEG / PNG / WebP | From Jan 31, 2027, minimum rises to 500 × 500 px enforced |
| Print catalog | 300 dpi | TIFF or PNG | Convert to CMYK color mode |
According to Google’s WebP compression study, WebP files are 25–34% smaller than equivalent JPEGs at the same visual quality. That directly improves Largest Contentful Paint on product pages — a Core Web Vitals ranking signal.
If you’re prepping the same product photograph for Amazon, Shopify, Etsy, and Google Shopping in one pass, a free browser-based tool like this quick image resizer handles up to 20 images at once with platform presets — useful before you upload.
The 11-Step Professional Editing Workflow
Professional studios do not guess the order. They follow the same eleven steps every time, which is how catalogs stay visually consistent across thousands of SKUs.
- Perform lens corrections to fix wide-angle distortion and chromatic aberration.
- Straighten the horizon so the product does not feel tilted.
- Choose your crop — keep the product centered with consistent negative space.
- Fix exposure using Bridge, Lightroom, or Camera Raw sliders.
- Reduce noise in shadow areas and dark corners.
- Correct white balance using a grey card, color checker, or true-white reference.
- Dial in contrast with Curves, Levels, and Clarity — restraint wins.
- Check the histogram to prevent clipped blacks or blown whites.
- Adjust colors subtly with Vibrance and Saturation.
- Sharpen to enhance detail without introducing halos or crunch.
- Export in the correct format, dimensions, and color profile for each destination.
Running the sequence in this order minimizes destructive edits and keeps every image visually consistent across shoots.
Color Profiles: sRGB, Adobe RGB, or CMYK?
The color profile is the single most common technical mistake in e-commerce editing — and the fix takes ten seconds.
- sRGB — the universal standard for the web, mobile apps, and every major marketplace. Every browser expects sRGB. Amazon, Shopify, and Google Merchant Center all render sRGB. Use this for anything online.
- Adobe RGB — a wider color gamut used for professional print and high-end retouching workflows. Colors captured in Adobe RGB and uploaded without conversion appear dull and desaturated on standard browsers.
- CMYK — the print production standard. Use only when exporting for physical print (catalogs, packaging, magazine spreads).
The one rule to remember: in Photoshop, use Edit → Convert to Profile → sRGB IEC61966-2.1 before every web export. If your images look flat when uploaded to Amazon or Shopify, this is almost always the reason.
How to Batch Process Product Photos at Scale
For catalogs above 100 SKUs, batch processing turns days of work into hours.
Three tools worth learning:
- Lightroom Classic — the fastest way to sync white balance, exposure, and lens corrections across hundreds of images. Edit one master, right-click, choose Sync Settings, and apply to every selected file.
- Photoshop Actions and Batch (File → Automate → Batch) — record repetitive edits once, then run them across an entire folder while you make coffee.
- Adobe Bridge — best for renaming, sorting, and applying metadata to thousands of files before they even enter Photoshop.
For AI-assisted bulk work, tools like Photoroom, Remove.bg, and Adobe Firefly’s Generative Fill handle background removal on hundreds of images in minutes. Pair them with a manual quality-control pass on hero images and complex products.
In-House Editing vs Outsourced Editing — The Real Math
For catalogs under 50 images per month, in-house editing wins on speed. Beyond that, outsourcing almost always pays off in both cost and consistency.
Verified 2026 outsourced rates per image:
- Basic background removal: $0.25 – $1.00
- Clipping path (basic to super complex): $0.30 – $5.00
- Image masking (hair/fur/glass): $0.99 – $5.99
- Ghost mannequin: $0.79 – $5.00
- Shadow creation: $0.25 – $2.00
- Photo retouching: $0.90 – $6.99
- Jewelry retouching: $0.99 – $6.99
- Full retouching (color + shadow + cleanup): $1.50 – $5.00
Volume discount structure typical across the industry: 10% off for 50+ images, 20% for 100+, 30% for 500+, and 40% for 1,000+.
Simple math: a 500-SKU brand shooting quarterly saves five figures per year by outsourcing bulk work and keeping only hero-image retouching in-house.
How to Brief an Outsourced Photo Editor
The single biggest reason outsourced editing “doesn’t work” is a bad brief. Fix the brief and quality problems evaporate. A complete brief includes:
- Reference images — two or three “gold standard” edits that represent your ideal output.
- Style rules — background color hex (usually #FFFFFF), shadow style, cropping ratio, and negative-space margin around the product.
- File naming convention — for example,
SKU12345_main.jpg,SKU12345_alt1.jpg. - Export specs — exact dimensions, file format, color profile, and maximum file size per destination.
- Do-not touch list — any product feature that must remain 100% unchanged (labels, logos, gemstone facets, certification marks).
- Turnaround SLA — hours from delivery to first draft, and the revision policy.
Clear briefs reduce revision rounds by more than half. Studios that receive one-line requests deliver one-line-quality output; studios that receive documented briefs deliver work you can ship without checking.
Marketplace Image Rules at a Glance (2026)
Every platform enforces its own image rules. Break them, and listings disappear from search or get suppressed. The current specs:
Amazon — main image:
- Pure white background (RGB 255,255,255).
- Product fills at least 85% of the frame.
- Minimum 500 px on longest side; the Amazon Seller Central image guide prefers above 1,000 px so zoom activates.
- No text, watermarks, borders, or additional props on the main image.
- Up to 9 total images per listing.
Shopify:
- 2,048 × 2,048 px square product images (Shopify’s own recommendation).
- Hero banners at 1,920 × 1,080 px.
- WebP where the theme supports it for faster load and better Core Web Vitals.
Etsy:
- Recommends listing photos of at least 2,000 pixels on the shortest side.
- File types: JPG, GIF, PNG, SVG, HEIC.
- 10 photos plus 1 video per listing.
Google Merchant Center:
- Recommended 800 × 800 px or higher, up to 64 MP.
- Google treats above 1,024 px as high-resolution.
- Beginning January 31, 2027, primary and additional product images must be at least 500 × 500 px — start preparing now.
Walmart Marketplace:
- 2,000 × 2,000 px recommended, 1,500 × 1,500 px minimum for zoom.
- Seamless white background; 4+ images per listing.
Our own deep-dive on Amazon listing images walks through each rule with visual examples for common product types.

Manual vs AI Editing: Honest 2026 Comparison
| Approach | Strength | Weakness | Best For |
|---|---|---|---|
| Manual Photoshop | Pixel-perfect edges, safe on hair/glass/jewelry, marketplace-compliant, unlimited revisions | Slower per image, higher per-image cost | Hero shots, complex products, revenue-critical listings |
| AI background removal | Seconds per image, near-zero marginal cost, easy to scale | Fails on hair against dark backgrounds, misreads transparency, leaves fringes | High-volume simple products, secondary images, drafts |
| Hybrid AI + human QC | Combines AI speed with manual quality control | Requires workflow discipline and a review step | Most professional studios in 2026 |
The uncomfortable truth: neither AI-only nor manual-only is optimal in 2026. Studios that ignore AI leave speed on the table. Sellers who ship AI-only edits get rejected by Amazon or refunded by shoppers who noticed the fringing.
Common Product Photo Editing Mistakes to Avoid
Even experienced editors make these errors. Fixing them lifts quality overnight:
- Over-retouching skin or products — plastic surfaces kill authenticity.
- Wrong white balance — a warm cast makes white t-shirts read cream on-listing and drives color-mismatch returns.
- Inconsistent backgrounds across a catalog — breaks the shop’s visual rhythm and looks amateurish.
- Clipping blacks or blowing whites — permanent detail loss; check the histogram before every export.
- Uploading Adobe RGB files to the web — colors flatten in every browser; convert to sRGB first.
- Oversized files — 5 MB PNGs on product pages slow mobile loading and create a poor shopping experience.
- Missing shadows — cutouts on pure white look fake; even a subtle drop shadow adds realism.
- Aggressive saturation — reads as 2005-era editing and destroys trust.
- Editing on an uncalibrated monitor — you cannot fix what you cannot see accurately.
Photographers frequently lose repeat clients over inconsistent editing more often than over the initial shoot quality. Consistency is the currency.
Real Example: Editing a Jewelry Product Shot
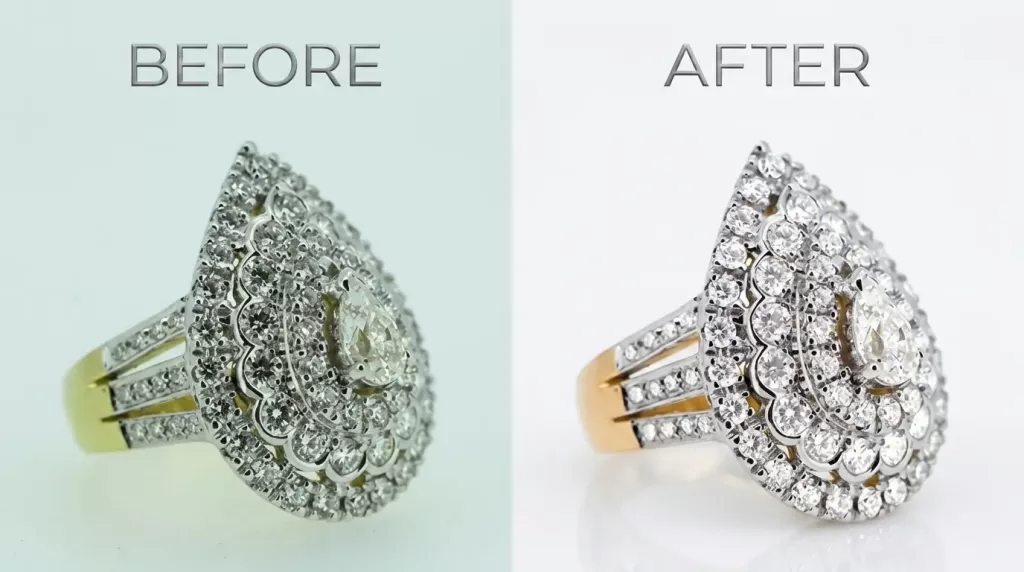
You photograph a diamond ring in the studio and pull the raw file. It shows dull metal, dust on the band, uneven highlights, and a softbox reflection on the shank. Here is exactly how a professional editor cleans it:
- Clip the ring with a manual pen-tool path at 400% zoom, one anchor every 8–12 pixels.
- Remove dust and micro-scratches using the Healing Brush at pixel-level detail.
- Enhance sparkle with dodge-and-burn on the diamond facets — dodge highlights, burn shadow lines.
- Correct metal color so gold reads gold, not orange, using Selective Color on Yellows.
- Reduce reflections without killing the natural shine — mask the softbox reflection only.
- Add a reflection shadow beneath the ring to imply a polished display surface.
- Convert to sRGB, export as a marketplace-compliant JPEG, and archive a layered PSD.
The same principles scale to watches, cosmetics, sneakers, and any product where surface finish matters.
Looking for a cost-effective way to perfect your jewelry photos?
Get luxury-level editing at affordable rates with our Jewelry Photo Editing Service
2026 Trends Shaping Product Photo Editing
The editing landscape shifts fast. Six trends define the year:
- Editorial and lifestyle imagery — expressive, story-driven visuals winning PDP real estate over flat catalog shots.
- Hybrid AI + human workflows — AI handles bulk background removal; humans handle craft, hero shots, and compliance.
- 360-degree spin photography — immersive product views closing the online-vs-store touch-and-feel gap.
- Vertical, mobile-first aspect ratios — most e-commerce browsing now happens on phones, and 4:5 or 9:16 crops win the fold.
- AI-generated lifestyle backgrounds — synthetic scenes replacing costly location shoots for secondary images.
- WebP-first exports — Core Web Vitals pressure pushing stores off JPEG defaults.
Sellers who lean into these while holding quality standards tight will outperform catalogs that plateau on 2022-era workflows.
Alternatives to Full Manual Editing
Not every store needs a full retouching pipeline. Alternatives:
- Pure AI pipelines — cheapest and fastest for early-stage stores with simple products.
- Template-based editors (Canva, Photoroom Pro) — solid for social ads and secondary images.
- In-house Lightroom presets — good enough for consistent DIY shoots.
- Hybrid AI + human QC — the professional 2026 default.
- Smartphone editing apps — passable for micro-brands and prototypes.
Match the level of investment to the revenue at stake. A hero image on a $500 product deserves more attention than filler shots on a $9 accessory.
FAQ — People Also Ask
What is the best file format for e-commerce product images in 2026?
Use JPEG for standard product photos, PNG for transparent cutouts, and WebP when the platform supports it. Google’s own compression benchmarks show WebP files are 25–34% smaller than JPEG at equivalent visual quality, which directly improves page-load speed and Core Web Vitals.
How many product images should each listing have?
Amazon allows up to 9 images per listing. Complete listings with seven or more views plus a short product video consistently outperform sparse ones. Aim for one main white-background shot, three lifestyle angles, two detail close-ups, and one comparison or size infographic.
Do I still need manual editing if I use AI tools like Photoroom or Remove.bg?
Yes for revenue-critical images. AI handles bulk work well but struggles with hair, transparency, reflections, and edge fringing. Pair AI speed with a manual quality-control pass on hero images and complex products.
How much does professional product photo editing cost per image in 2026?
Verified rates run from $0.25 for basic background removal to $6.99 for super-complex jewelry retouching. Most catalogs land between $0.50 and $2.00 per image once volume discounts activate at 50+ images.
What is the difference between a clipping path and image masking?
A clipping path is a hand-drawn vector outline used for hard-edged products. Image masking uses alpha channels and refine-edge for soft or transparent details such as hair, fur, veils, and glass. Complex products frequently need both.
Which color profile should I use for online product photos?
Always sRGB. Every browser, marketplace, and mobile app renders sRGB natively. Adobe RGB and CMYK are for professional print, not the web — uploading them results in flat, desaturated colors on-listing.
How can I keep my catalog visually consistent across thousands of SKUs?
Build a written style guide covering background hex, cropping ratio, shadow style, color-grading preset, and file dimensions. Apply it uniformly through Lightroom sync settings, Photoshop actions, and — if outsourcing — a documented brief with reference images.
Does product photo editing affect how well products appear in Google Search?
Yes, both directly and indirectly. Descriptive alt text, relevant filenames, and structured data can help search engines understand your images. Google’s image guidelines explain how image optimization can support search visibility. Image optimization also improves page performance, while compressed images can help reduce loading times and improve the overall user experience.
Final Thoughts
Great e-commerce product photo editing is invisible. Shoppers do not say, “That was beautifully retouched.” They say, “I trust this brand,” and hit Add to Cart. The ten-technique framework and eleven-step workflow above is the same one used by high-performing studios worldwide — background removal, clipping, masking, color, shadow, ghost mannequin, retouching, multi-clipping, sharpening, export.
For catalogs above 50 SKUs per month, outsource. For fewer, invest in Lightroom, one Photoshop workflow, and a documented style guide. Either way, treat editing as revenue infrastructure — not a cosmetic afterthought.
Ready to transform your raw photos into professional assets?
Get a custom, no-obligation quote tailored to your specific volume and needs. Explore Clipping Expert Asia